Taking Wordpress blog to HTTPS with CloudFlare in less than 10 minutes!

Making your website secure has never been easier! I was able to take my WordPress blog to HTTPS in less than 10 minutes!
CloudFlare
This part is super easy and straight-forward. Just sign up for CloudFlare, go to cloudflare.com/a/add-site and follow instructions. You can also check this Troy Hunt's demo to see it in action.
Once you finish, your website will be running on HTTPS!
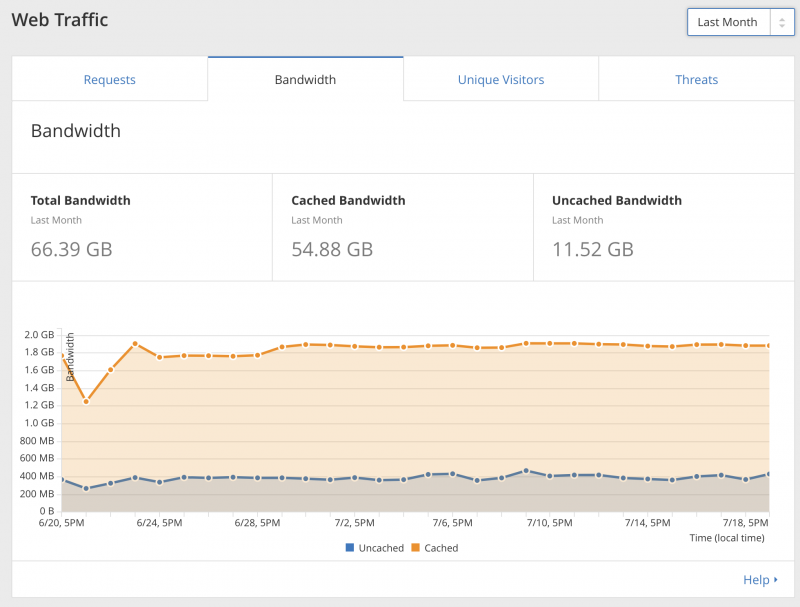
Additional benefit is taking advantage of CloudFlare cache! For free! As you can see on the below screenshot, in last month: 54/66 GB was served from CloudFlare, only 11/66 GB came from my server!
WordPress
If you have WordPress blog (like I do), above setup will take your website to HTTPS, but all urls (hyperlinks, images, stylesheets etc.) will be still HTTP. This will result in mixed content error.
I love WordPress because every problem you may have was already solved by somebody else :) In this case problem is solved by CloudFlare Flexible SSL Plugin.
Multiple domains
If you have multiple domains pointing to your blog, things are a little bit more complicated: Wordpress Multisite SSL with domain mapping using Cloudflare .
Summary
If you want to learn more about HTTPS, check out What Every Developer Must Know About HTTPS. It is also worth to remember that HTTPS might be faster than HTTP!
Is your website secure? Why not?